Tracking repairs and MOT advisories
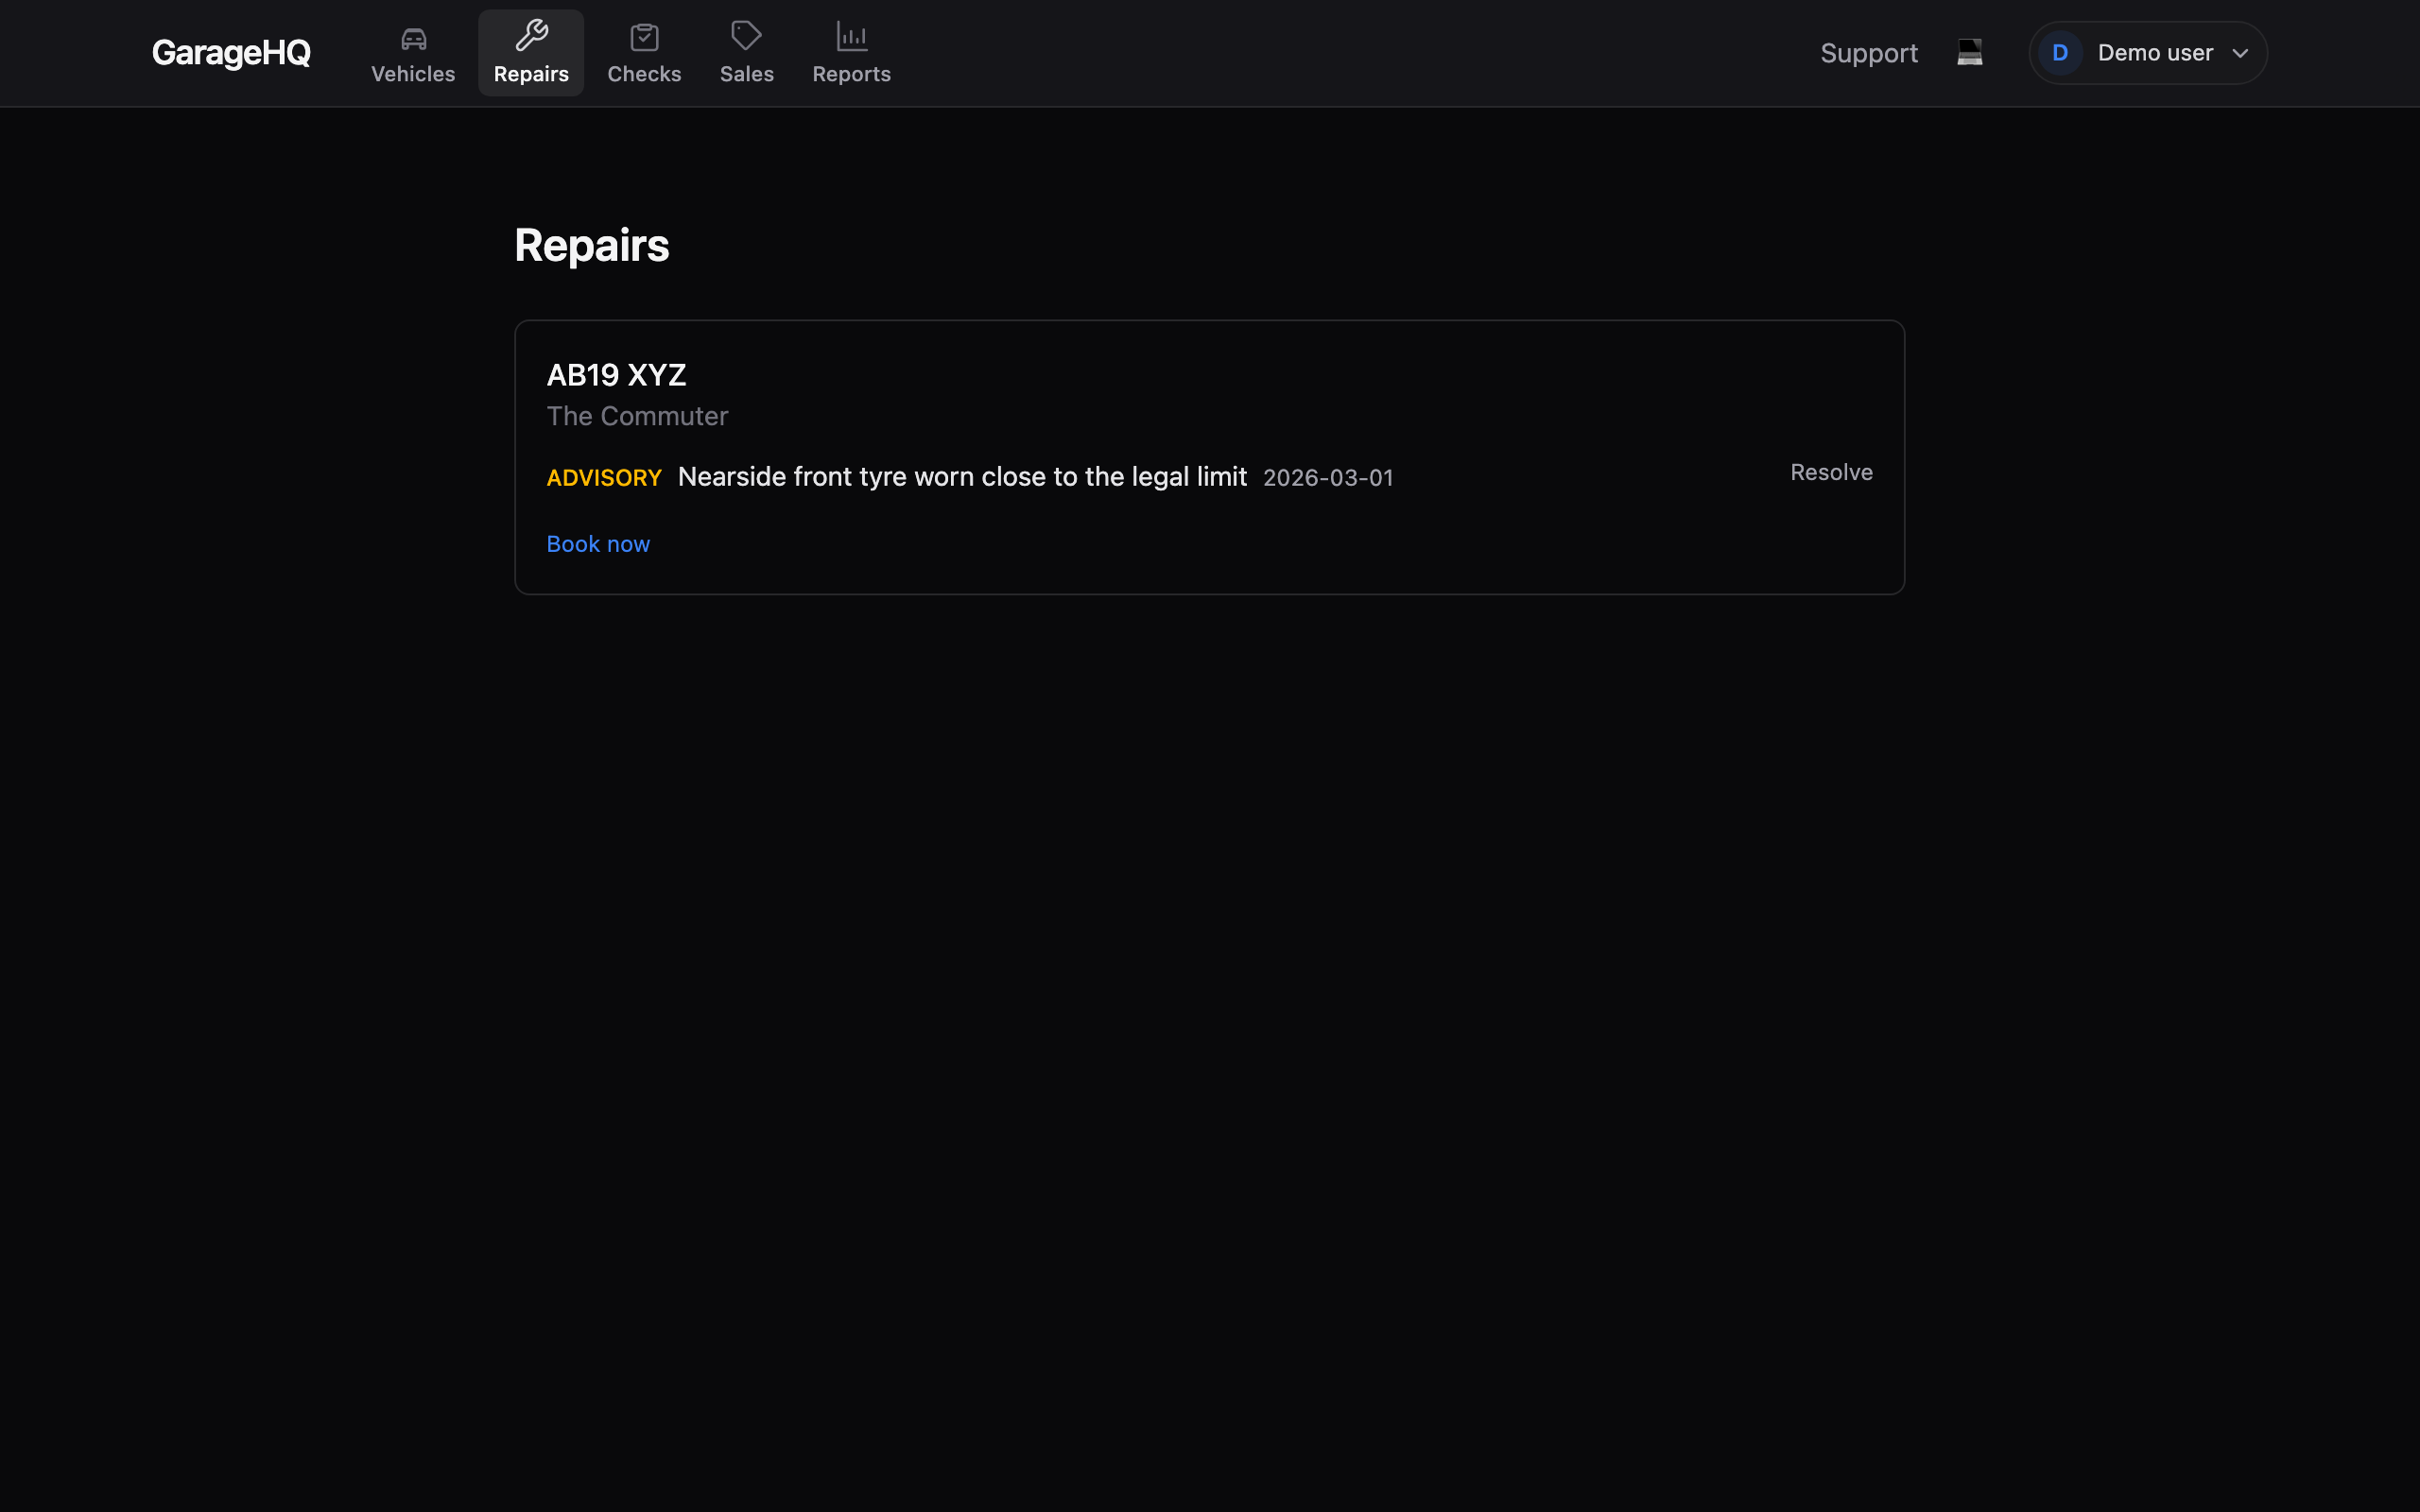
The Repairs page collects every unresolved MOT advisory from your vehicles and puts them in one list, so nothing slips through between MOT cycles. Each advisory shows the test date it came from, its severity category, and the defect text exactly as DVSA recorded it.
When a repair is done, you mark it resolved: either linking the cost or receipt as proof, or simply noting it as handled. If the vehicle has a garage assigned, a "Book now" button opens a pre-filled email to that garage with the registration, make and model, and a summary of the outstanding advisories, so you can request the work in a couple of taps.
1. Read the repairs list
Each vehicle appears as a card. The card header shows the registration and, if you have set one, the vehicle's nickname or make and model beneath it.
Inside the card, each advisory is listed with:
- its type (ADVISORY, MINOR, MAJOR, or DANGEROUS) in the appropriate colour,
- the defect text from the MOT record,
- the MOT test date it was flagged on.
2. Resolve an advisory
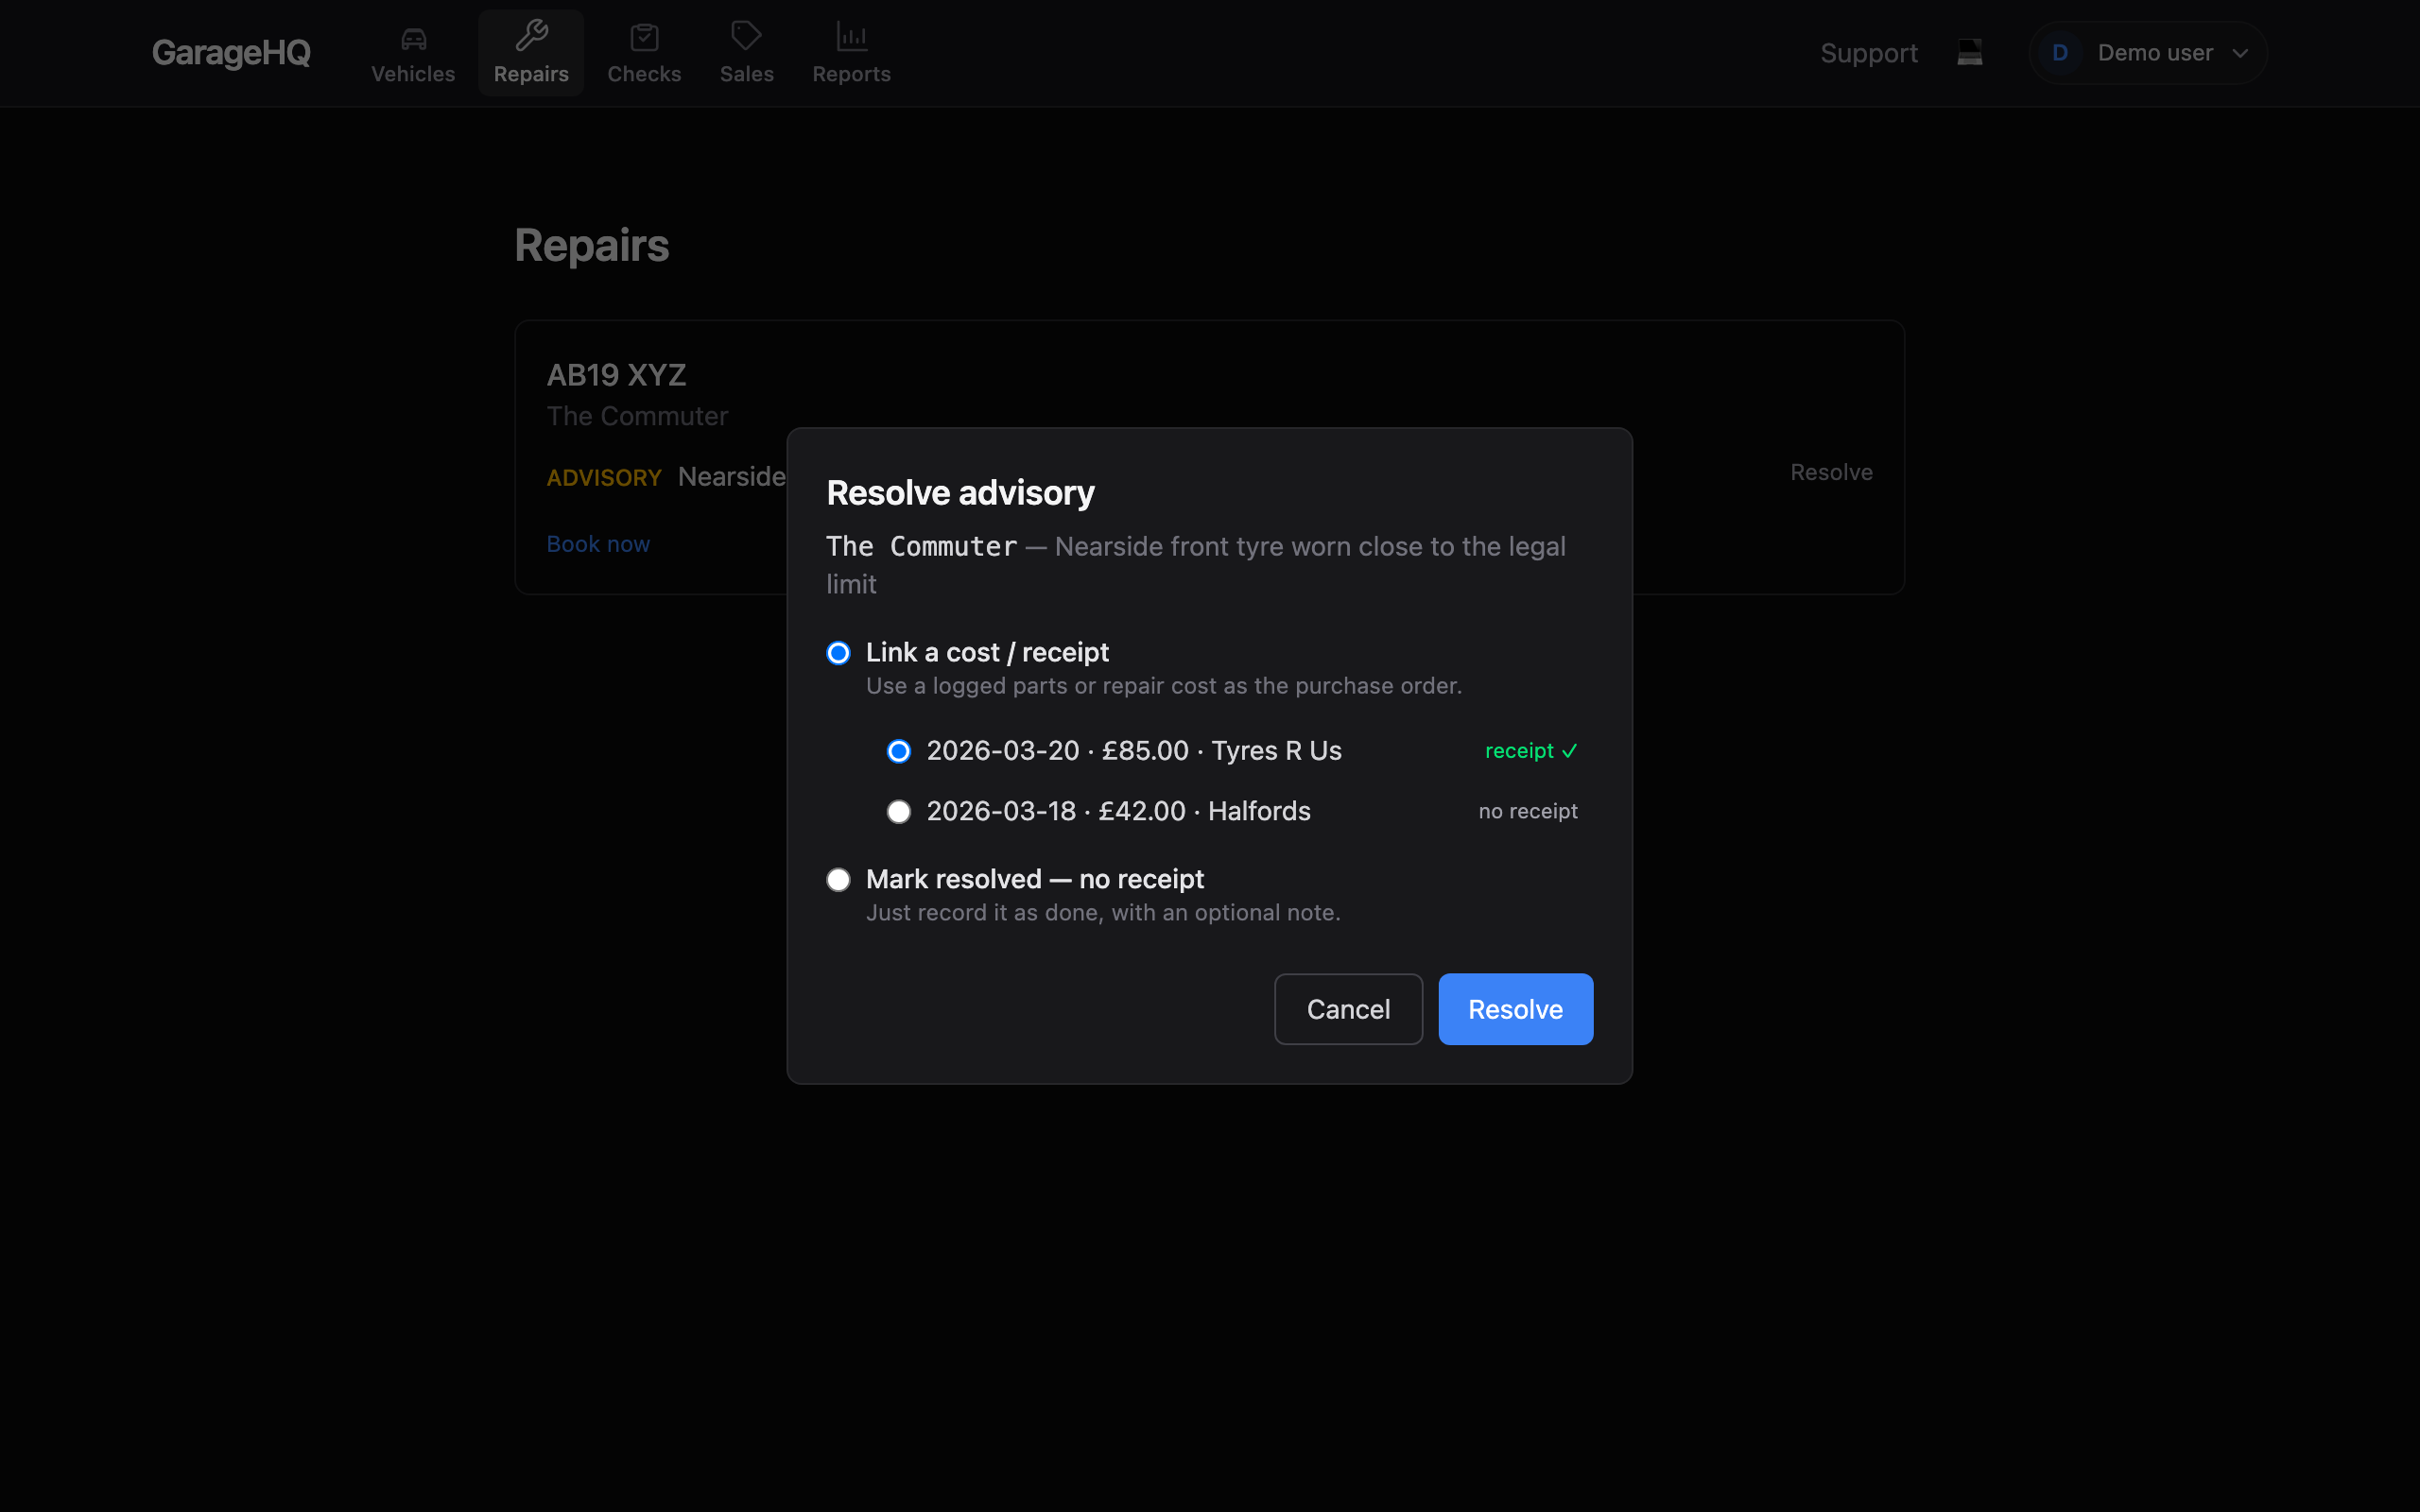
When a repair is complete, click Resolve on that row. A dialog opens with two ways to record it:
- Link a cost / receipt: choose a parts or repair cost you have already logged against the vehicle. Its receipt becomes the proof of repair (the "purchase order"); costs that have a receipt attached are marked.
- Mark resolved (no receipt): just record it as done, with an optional note (for example, "fixed by the previous owner").
Click Resolve to confirm, or Cancel to close without changing anything. The advisory is removed from the list, but it is not deleted from the underlying MOT history; it is marked as handled so it no longer appears here.
3. Book repair work with your garage
If you have a garage assigned to the vehicle, a Book now button appears at the bottom of the card. Clicking it opens a pre-filled mailto: message addressed to that garage, with the registration and the outstanding advisory text in the body, ready to send from your mail client.
To assign a garage to a vehicle, open the vehicle, go to the Settings tab, and pick one from the Garage dropdown. If you have not added the garage yet, see Adding a garage first.
4. See and undo resolutions in MOT history
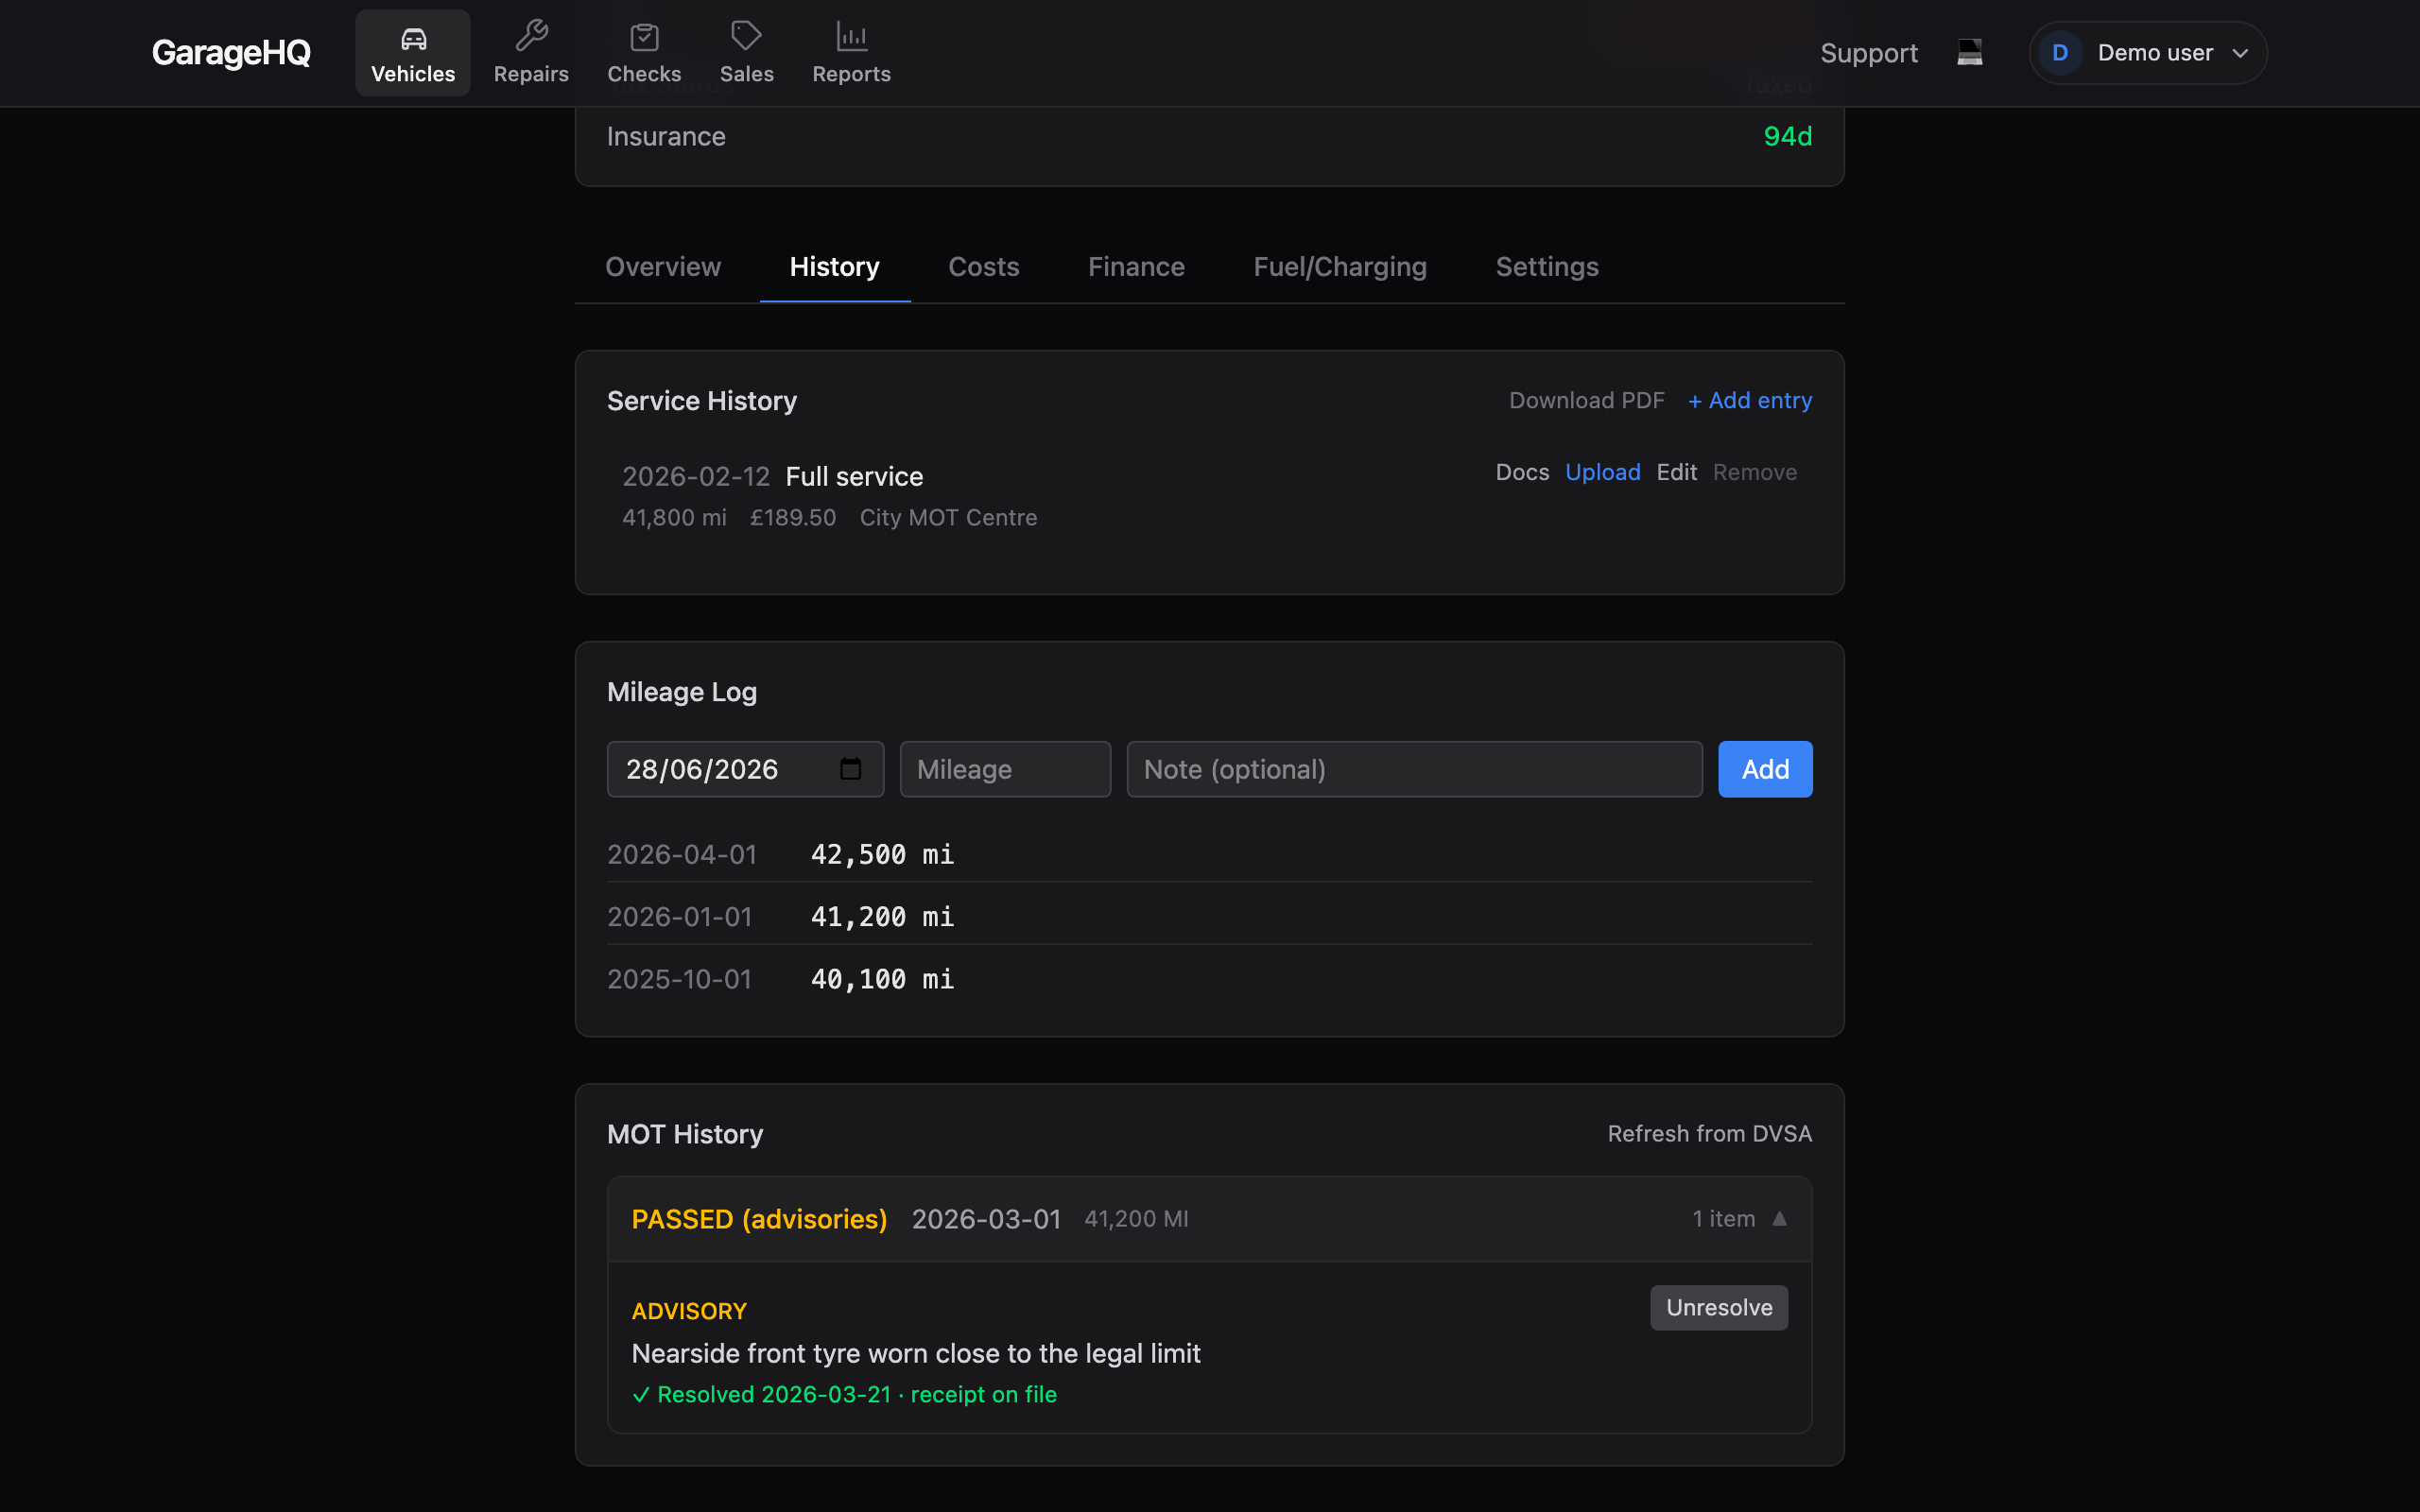
Resolved advisories are not lost. Open the vehicle and go to the History tab: each MOT defect you have handled shows a green Resolved badge with the date, your note, and "receipt on file" when you linked a cost. If you marked something resolved by mistake, click Unresolve on that defect to send it straight back to the Repairs list.
What next?
- MOT history to see the full timeline of past tests and all recorded defects for a vehicle.
- Adding a garage to set up the workshop contact so the Book now button has somewhere to send the email.
- Tracking vehicle costs to log the cost of the repair once the work is done.